Step-by-Step Guide to Drawing Optical Illusions
By Lea Byrnes Art
Are you looking for easy ways to make a trippy, yet intriguing optical illusion art piece to hang on your wall? Although creating your own art can seem like a challenge for some, don’t worry, we will recommend some easy illusion paintings and break the process down for you. We are going to be reviewing a few optical illusion techniques step-by-step to create some impressive drawings that are easier to make than they may look. Plus, taking the time to slow down and express your creative side through coloring is an awesome mindfulness activity that will help you reset and relax. Let’s dive in!

Designs by Lea Byrnes
Optical Illusion Hand Drawing
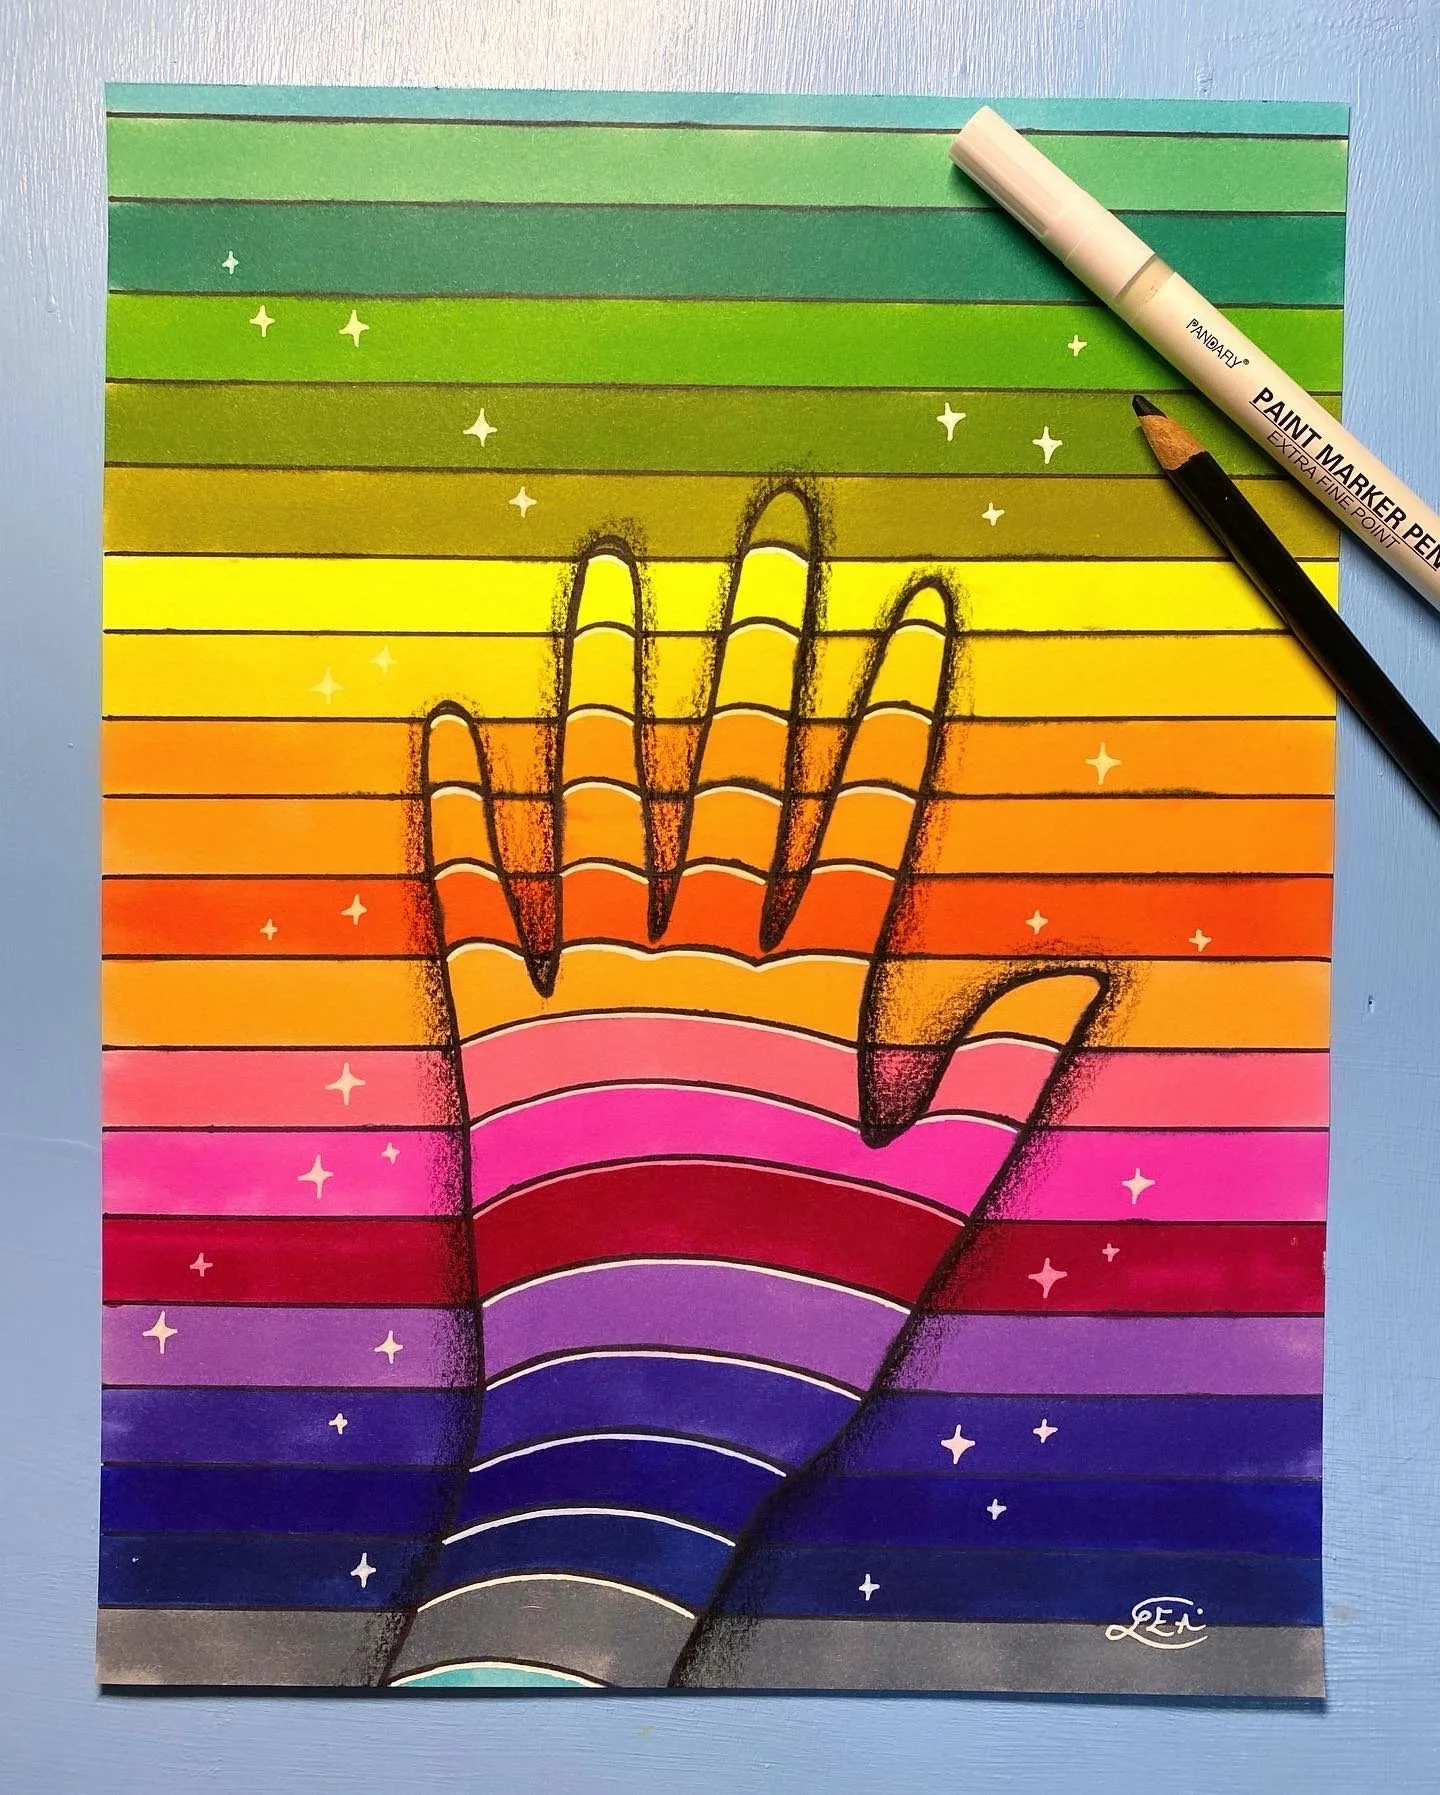
This optical illusion hand drawing is a fun and simple design that you can decorate in endless different ways. Let’s explore the steps of how I got to this final product!
Design by Lea Byrnes
Step 1: On a sheet of plain sketchbook or printer paper, trace your hand using a pencil. Make sure to add your wrist coming off the bottom of the page.
Note: You will most likely want to clean up your drawing a bit by smoothing lines and adjusting proportions. After tracing, I made the fingers a bit thinner and more realistically shaped.
When you are happy with the way the hand looks, take a ruler and draw evenly spaced lines all across the entire page from top to bottom, avoiding the area inside your traced hand.
Step 2: Using a black colored marker, trace back over the straight lines with your ruler, including the spots in between the fingers of the hand. I prefer to use a Sharpie.
Be careful not to accidentally draw straight lines through your hand!
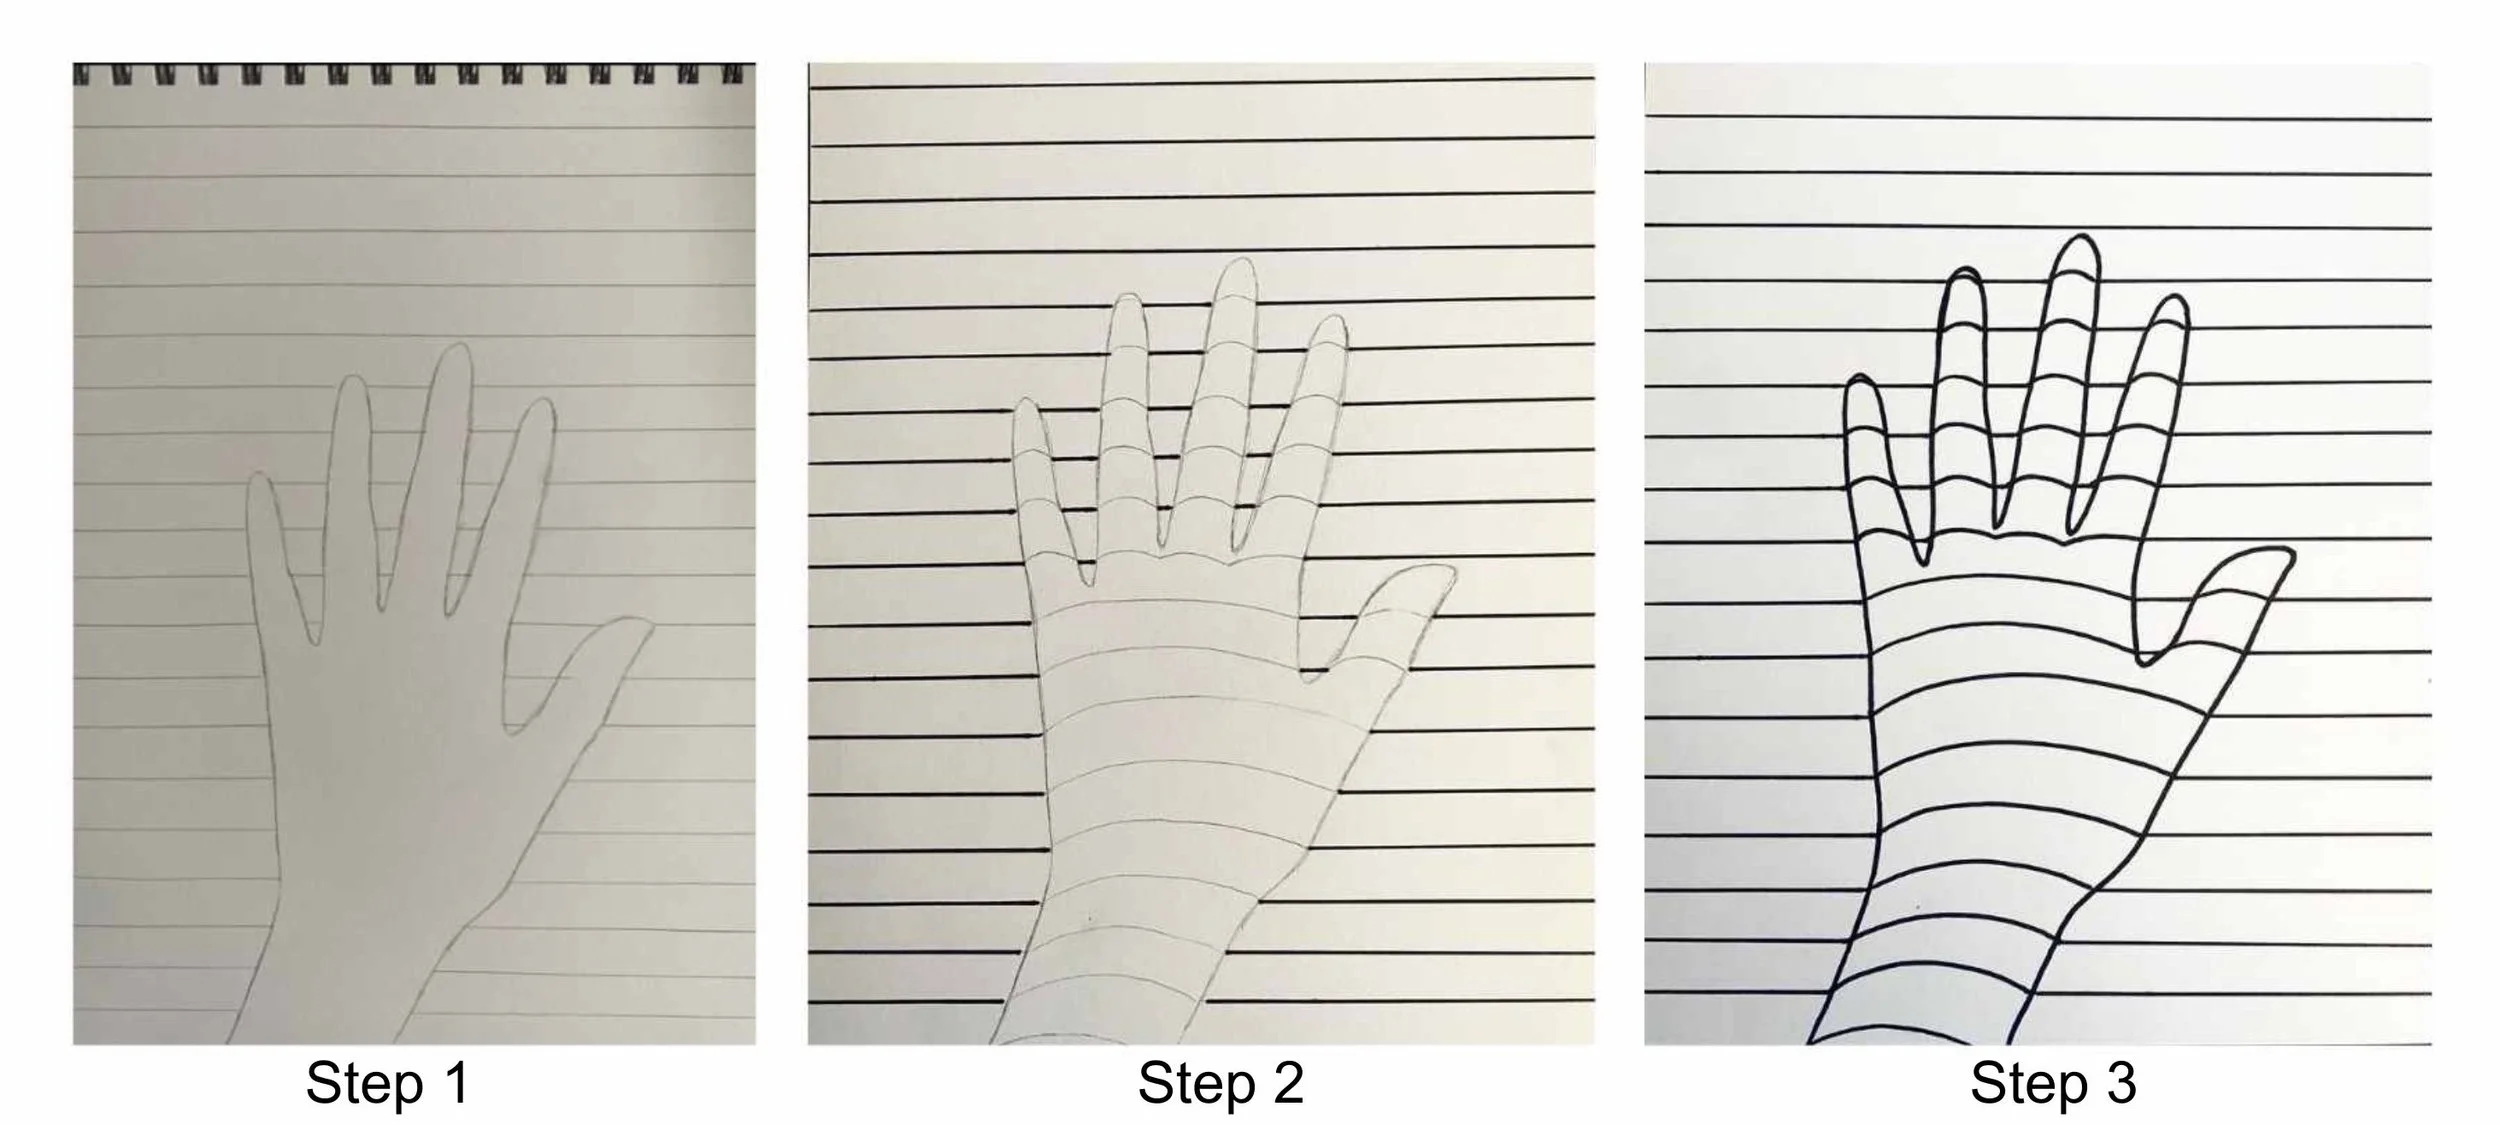
Step 4: Draw curved lines within the hand tracing, starting with where the straight lines touch the hand, and connect them together using lines that curve upwards to indicate the shape of the hand and fingers. In the spot where the knuckles are, you can draw a bumpy line to represent the knuckles.
Note: Remember to trace all of this with your marker or Sharpie.

Step 5: Add details! You can use mediums such as colored pencils, gel pens, or oil pastels to add even more detail to your piece. I chose to add stars, white accent lines inside the hand, and a colored pencil shadow around the hand. You could add words, patterns, or any other artistic things your heart desires.

Design by Lea Byrnes
The Trippy Tunnel
The next optical illusion drawing we are going to explore is what I like to call “the trippy tunnel”. This drawing almost looks like a portal to another universe! Plus, it can be done in two ways: with straight or wavy lines.
This optical illusion hand drawing can also be modified to other simple shapes besides a hand, such as a heart or a flower.
Now, let’s get into the steps for this awesome drawing!
Step 1: Using a ruler, draw a line dividing your paper in half, both horizontally and vertically. Then, add two more lines in between each section, creating 12 sections total.
Step 2: In every other section, add curved lines emanating from the center as shown.

Step 3: First, go over your lines in a dark marker or Sharpie. Then, add curved lines going outward in the remaining sections and color every other one in with your marker as shown. Make sure these lines match up to the ones in the opposite sections.
Step 4: In the remaining sections, shape the curves in the opposite way and color them in as opposites: black instead of white, and white instead of black.

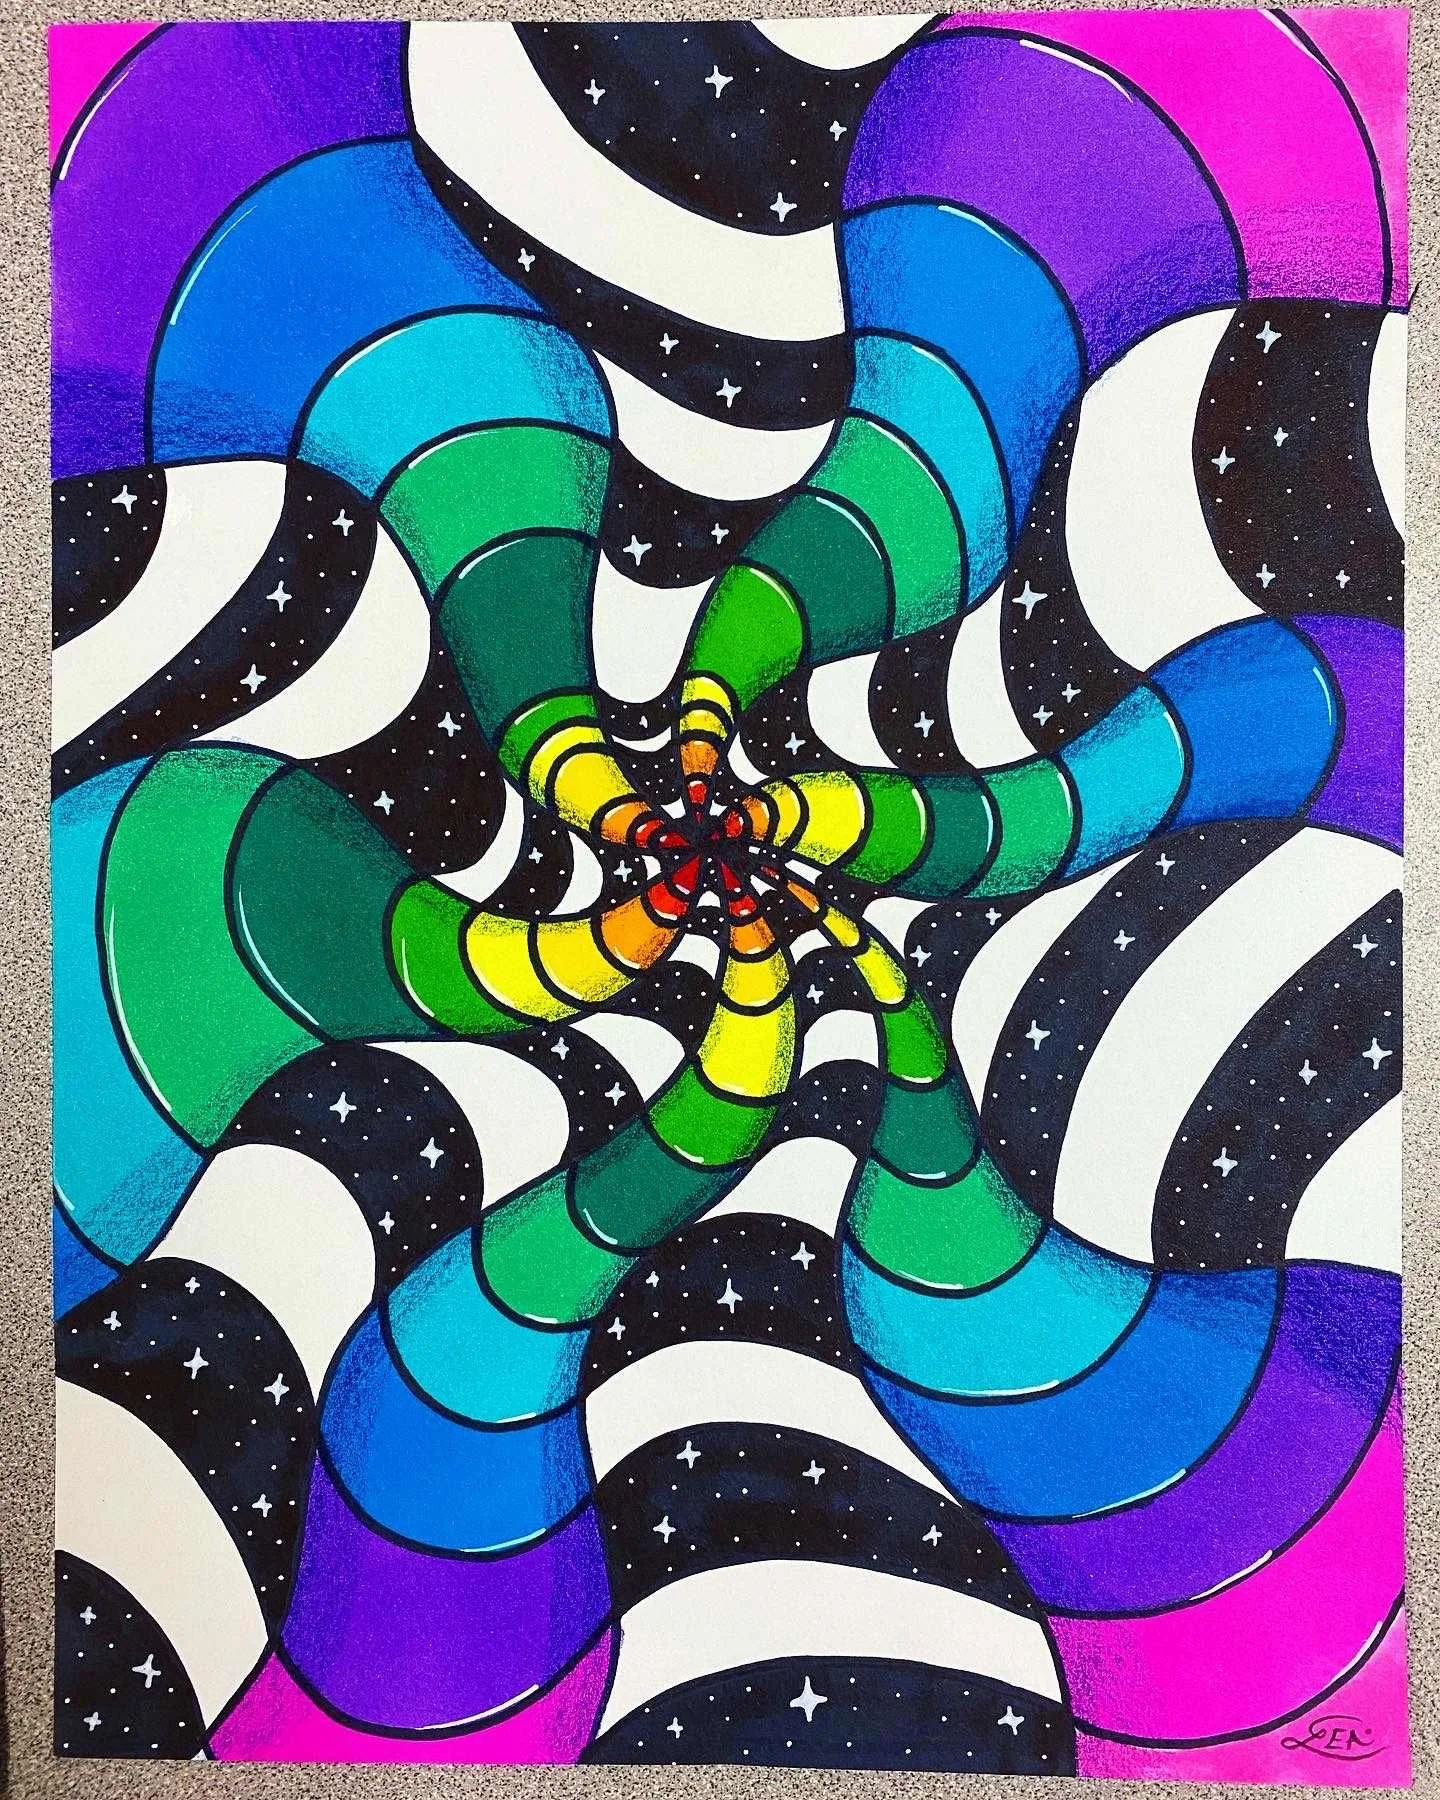
Step 5: Decorate! You can decorate in absolutely any way imaginable, but I chose to add rainbow colors with alcohol markers and some white stars with an acrylic paint pen. I also lightly shaded the colored sections with an indigo colored pencil and added a white highlight with my gel pen.
This drawing can also be made by sketching your 12 sections with wavy lines instead of straight ones. For my example, I chose to color it like this:
Design by Lea Byrnes
I thoroughly love this style of art projects and how these pieces look all together! I think the best part of the process is getting creative with the decorations and utilizing mixed media materials. Making illusion art can seem intimidating, but it is one of the most enjoyable ways to relieve stress, be present, and create something cool. Nothing beats being able to hang your art piece on your wall with pride knowing you’re the creative mastermind behind it. Ready to be an artist? Then give these a try!
Need more creative ideas?
Read “Neurographic Art: Rewiring Your Brain Through Art! A Step-by-Step Tutorial.”
Edited by Maddie on June 16th, 2024
